Programming Nextion LCD Without SD Card Arduino Project Hub
Nextion displays include either a resistive touch panel (RTP) or capacitive touch panel (CTP) and provide an easy way to create a touch screen interface, or human machine interface (HMI) for your project. The displays require a spare serial port to communicate with them.
Nextion 3.5" LCD 8 Function Calculator Arduino Project Hub
Step 1: The Nextion Display When I published the video about my top 5 Arduino displays a lot of the viewers suggested that I should try the Nextion displays as well. There are a lot of Nextion displays. The smaller one is the 2.4" inch display, and the larger one is the 7" display. I decided to try the 3.2" Nextion display. It costs around 23$.

PRODUCT PREVIEW NEXTION IN AN ARDUINO PROJECT (2) Arduino projects
This post is an introduction to the Nextion display with the Arduino. We're going to show you how to configure the display for the first time, download the needed resources, and how to integrate it with the Arduino UNO board. We'll also make a simple graphical user interface to control the Arduino pins. Watch the video demonstration

Nextion+Arduino Tutorial 4 Custom Gauge And Play Video in 2020
Nextion Arduino library provides an easy-to-use method way to manipulate Nextion displays series. Users can use the library freely, either for commercial projects or for open-source projects, without any additional conditions. There are ten examples in our library now. We will keep updating with more examples. Please visit our examples here.

Nextion Display with Arduino Getting Started Random Nerd Tutorials
I show a few examples of what you can do with a Nextion display and Arduino, and how to do it. For this 1st tutorial I will only send data from Arduino to th.
Playing With Nextion Display Arduino Project Hub
Arduino Nextion Android Midi Valve Guitar Amp. Paul Burford. 2021 Hackaday Prize. 2.7k 1.3k 12.

Arduino Nextion Display Tutorial
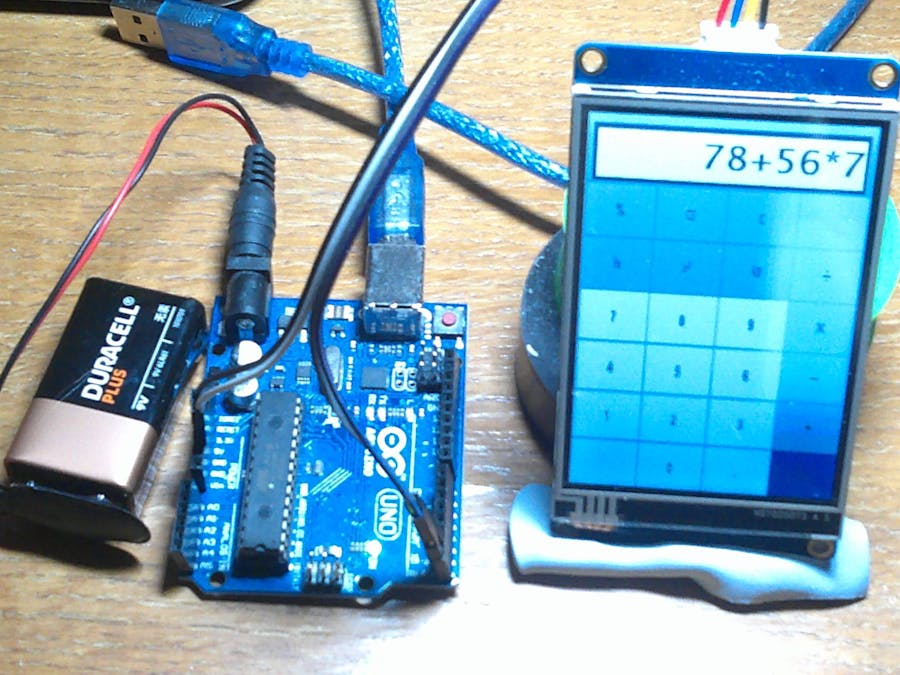
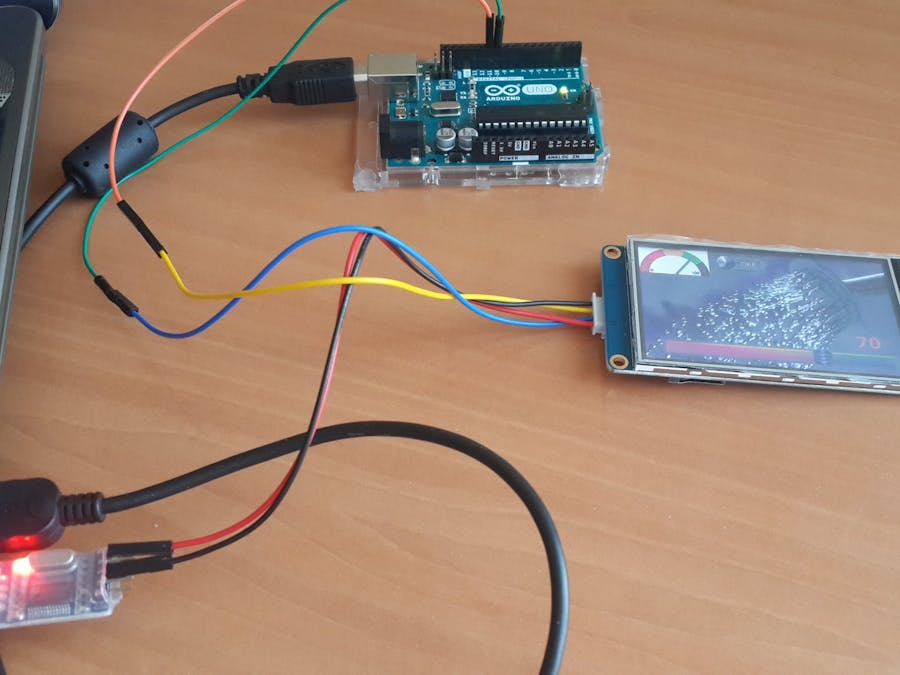
Step 5: Connect Your Nextion to the Arduino. Connect the red and black wires to 5V and ground on the Arduino respectively. Connect the blue (TX) wire of the Nextion pin 10 and the yellow (RX) wire to pin 11.
Arduino Nextion Display Tutorial
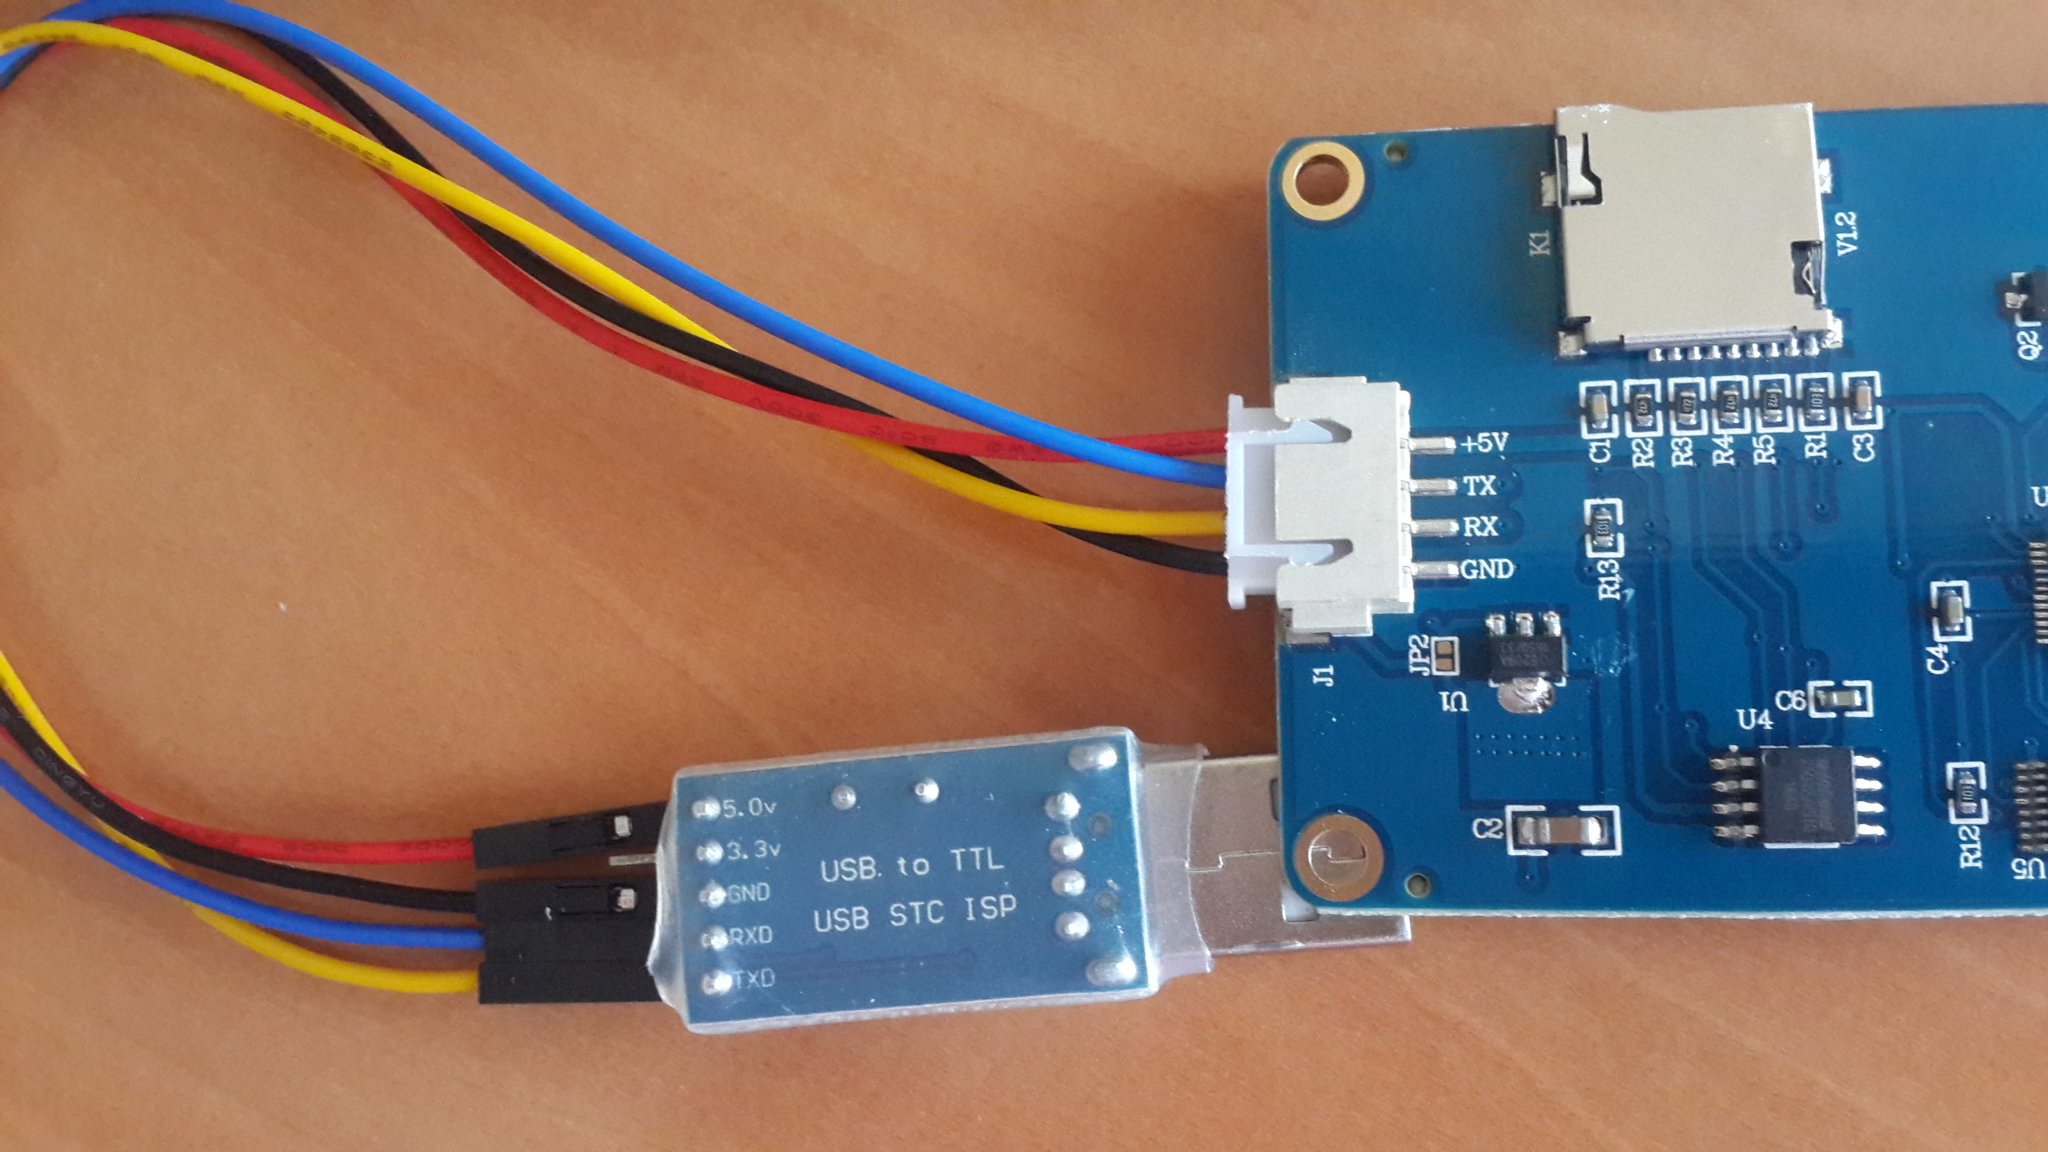
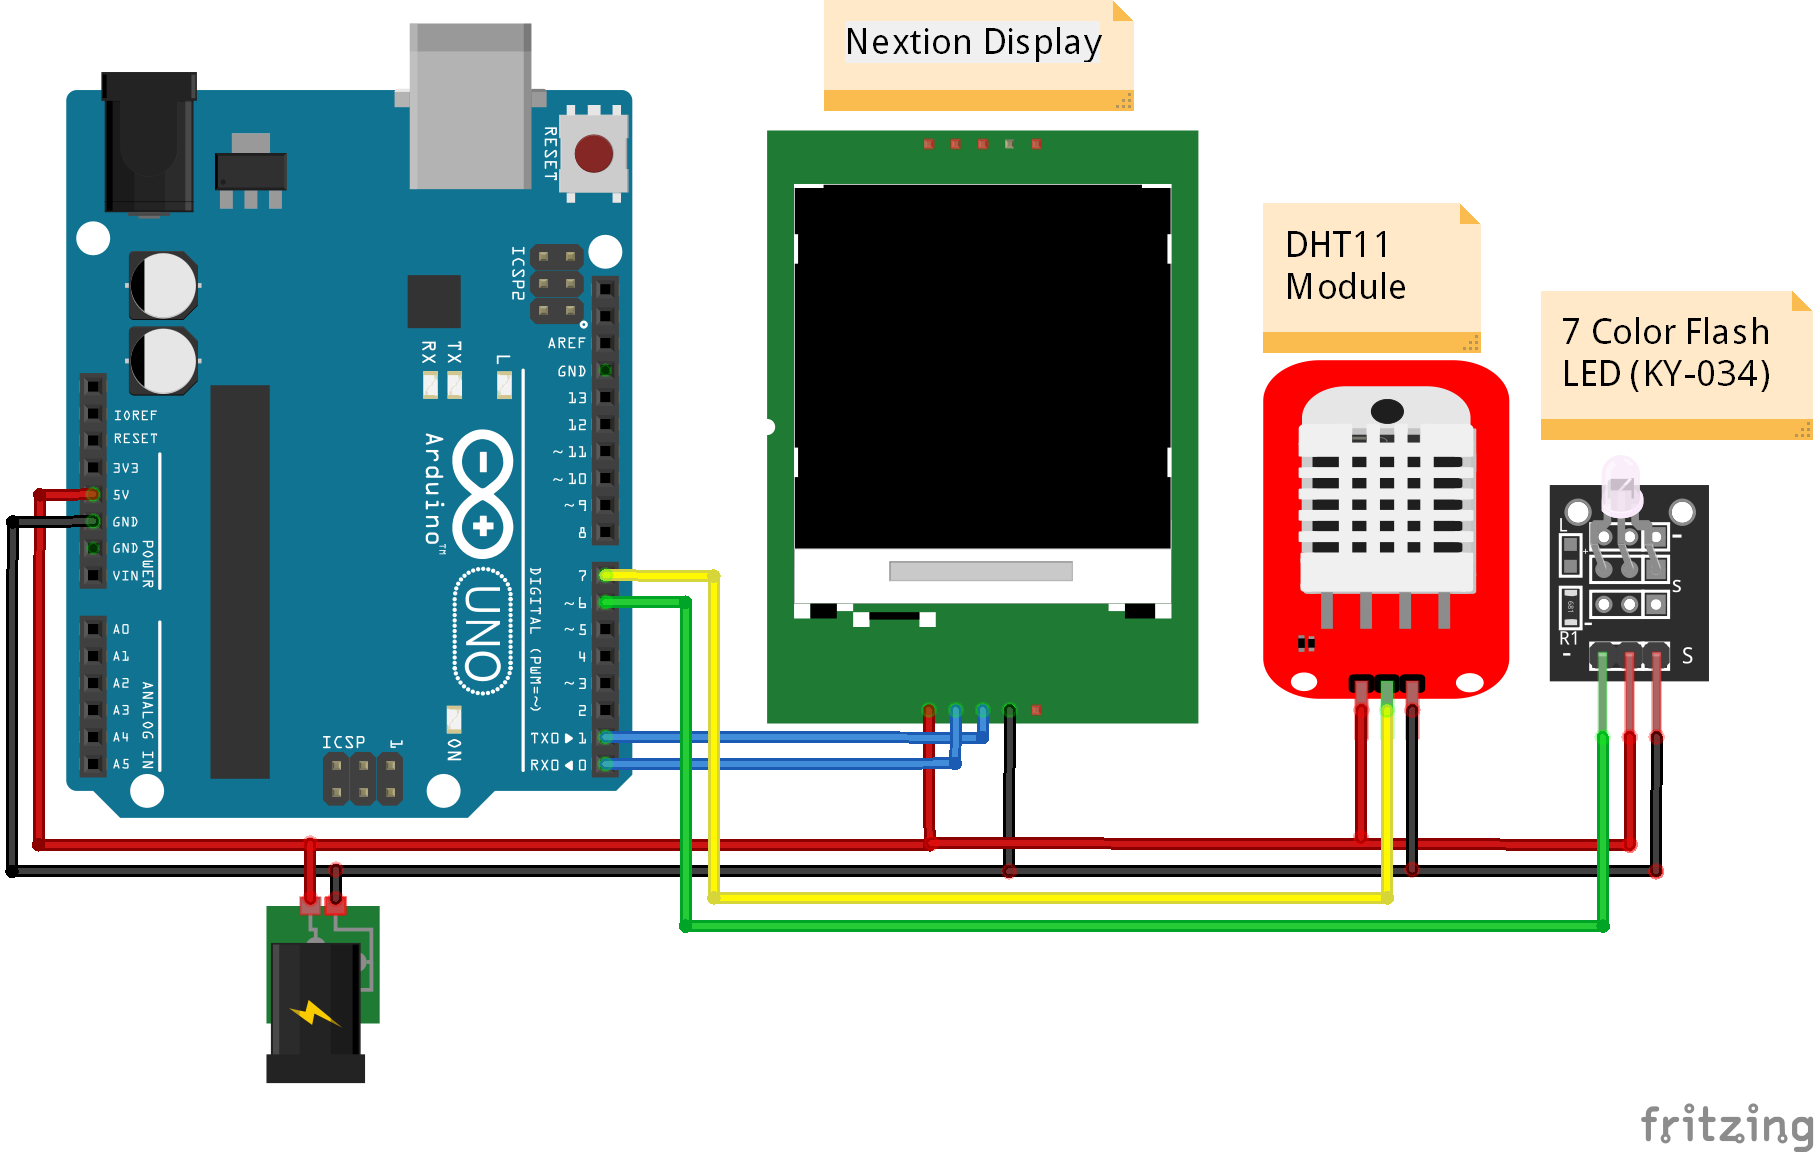
Step 1: Assembly In our project, we have a DHT22 sensor for reading values, an Arduino Uno, as well as the Display Nextion, which only has 4 wires: positive, negative, TX, and RX. This model also has an SD card slot, which also serves to boot and load the Bitmap images to be displayed on the screen.
Nextion Display What's the Magic? Arduino Project Hub
If you want to see the entire process of creating a project for the Nextion display and Arduino, this is the video for you. I start with very simple stuff an.
Arduino Nextion Display Tutorial
Figure 1 shows the schematic for this project. FIGURE 1. Nextion digital clock schematic. Figure 2 shows the completed circuit on a PCB. FIGURE 2.. (Figure 3) using the Nextion Editor and then add code for the ESP32 in the Arduino IDE (integrated development environment) to utilize the Nextion display page.

arduino nextion display YouTube
To configure the nextion library with Arduino, open the ITEDLIB_arduino_Nextion. Next, open NexConfig.h file. Change line no 37 and write #define nexserial Serial. And, save that file. In the code, we have first included the nextion and DHT libraries. And, have defined that DHT is connected with pin 4 of an Arduino.

Nextion Display with Arduino Getting Started Random Nerd Tutorials
The Easy Nextion, Arduino Prototyping Station: A simple desktop station designed for rapid prototyping. This comprehensive workstation can significantly expedite your development process, allowing you to bring your projects to life in a fraction of the time.
How A Nextion HMI TFT LCD Touch Display Screen Work For Arduino UNO
Send values from Nextion and store them on Arduino. As you have already understood it very difficult to assign the commands that you want in every Touch Event and much more difficult to read them separately for every event from the Serial and attach the function that you want on Arduino. In this example - project we need to update 2 variables x.
Nextion Arduino Project WhacAMole Crazy Cony Game Instructables
The communication between Nextion Display and Arduino is quite simple. There is no need for libraries and complicate commands as Nextion uses a simple and complete instruction set. A library cannot cover and guess all the needs of the projects wide field.
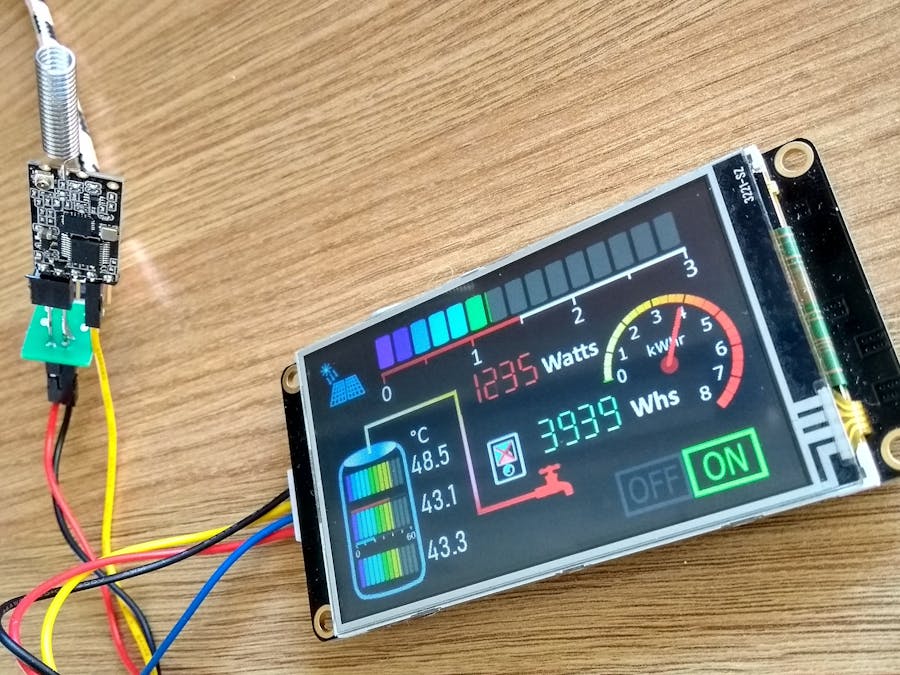
A Remote Wireless Connected Colour Nextion Display Arduino Project Hub
Athanasios Seitanis. On this website, you will find different projects of mine, based on open-source code. The purpose of this website is to give you the projects I have made, so that you make them better for eventual use. They are mostly based on Arduino, an open-source electronic prototyping platform enabling users to create interactive.
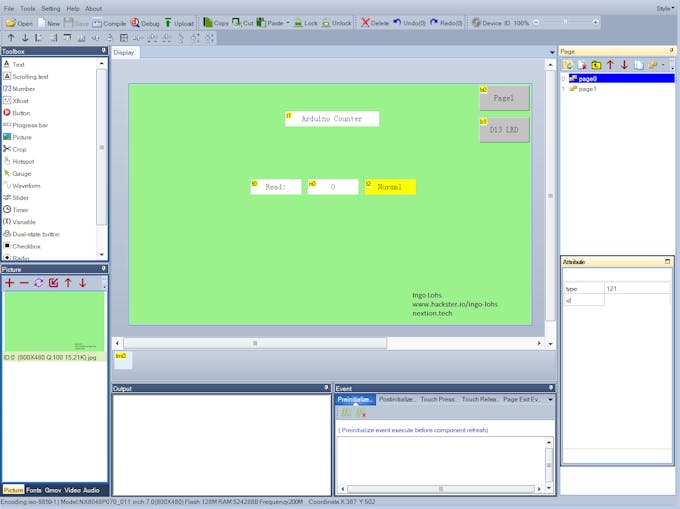
Nextion LCD communicate with Arduino UNO Arduino Project Hub
Step 1: What You'll Need 1x Arduino Uno 1x Nextion display (I had a 2.8" model) 1x LED 1x 330 Ohm resistor 6x male-male jumpers 1x bread board 1x USB cable to connect the Arduino to the PC 1x Micro SD card 1x Micro SD card reader that can connect to the PC A PC with the Nextion editor installed on Ask Question Comment Step 2: Creating Our Interface